Assign Agents to Agent Groups
To manage the groups to which an agent belongs:
- Click the Menu
 button and then select Settings.
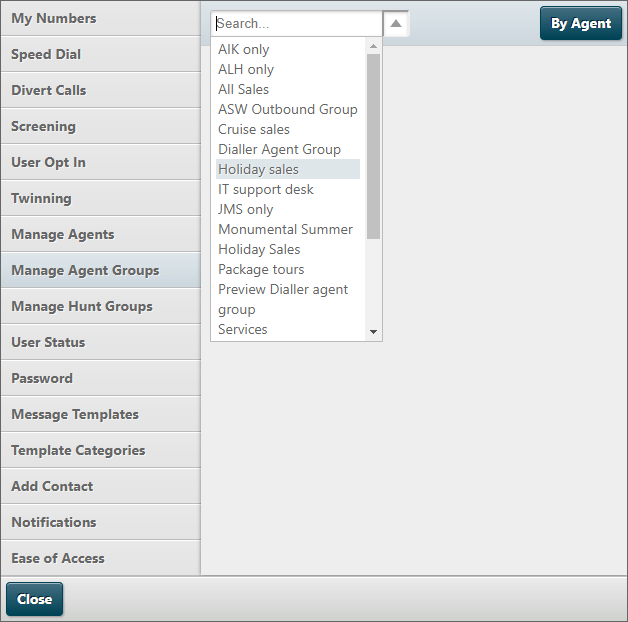
- Click Manage Agent Groups.
- Search for an agent group by typing any part of the group name in the Search box; or click the down arrow to select from the drop-down list.

- Click By Agent
 to search by agent name. This allows you to assign an agent to a group, or multiple groups.
- Click By Agent Group
 to search by agent group name. This allows you to assign an agent, or multiple agents to a group.
Note: you can only edit agents in the agent groups that are assigned to you.
Assigning Agents by Agent Group Name
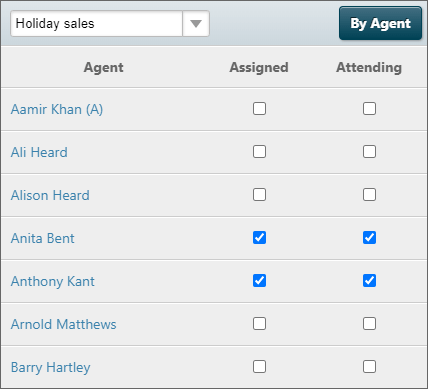
- Select the group that you want to manage.

- Select a check box in the Assigned column against the agents that you want to add to the group.
- If the agent group allows agents to opt out, clear the check box in the Attending column to opt the agent out of the group. (Agents can edit their own availability status using the User Opt-in screen in Settings > User Opt-in.
Note: the list displayed is divided into agents, agent groups, and if you have agents that are not storm users (typically agents in third-party call centres), anonymous groups.
Assigning Agents by Agent Name
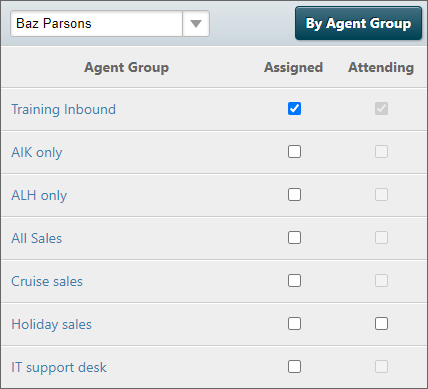
- Select the agent that you want to manage.

- Select a check box in the Assigned column against the groups that you want to add the agent to.
- If the agent group allows agents to opt out, clear the check box in the Attending column to opt the agent opt of the group. (Agents can edit their own availability status using the User Opt-in screen in Settings > User Opt-in.
Note: the list displayed is divided into agents, agent groups, and if you have agents that are not storm users (typically agents in third-party call centres), anonymous groups.
 button and then select Settings.
 button and then select Settings.

